

How To Draw A Simple Giraffe
Have you ever actually wanted to depict a giraffe, perhaps for a loved one who is fanatical most these cute long-legged and long-necked creatures, but you simply practise not know where to start? If this sounds like y'all, then you exercise not demand to wonder anymore. With our detailed examples and in-depth instructions, you will soon exist cartoon giraffes without so much as a second thought. So, without further ado, permit usa jump right into our easy giraffe drawing tutorial!
Table of Content
- i How to Depict a Giraffe Pace-past-Step
- i.1 Step 1: Constructing the Primary Trunk Shape
- one.2 Step ii: Placing the Giraffe Head
- 1.three Step 3: Beginning to Draw the Giraffe Face
- one.4 Pace 4: Adding Horns and Ears to Your Giraffe Head
- 1.5 Footstep 5: Connecting the Giraffe Head and Torso with the Neck
- 1.6 Step half-dozen: Placing the Front Legs of Your Giraffe Cartoon
- ane.seven Step 7: Drawing the Back Legs of Your Giraffe
- 1.8 Pace 8: Outlining the Tail of Your Giraffe Drawing
- one.9 Footstep 9: Creating the Concluding Outline of Your Like shooting fish in a barrel Giraffe Cartoon
- ane.x Pace ten: Creating the Signature Blueprint Particular
- 1.11 Step 11: Adding Texture Throughout Your Giraffe Cartoon
- 1.12 Step 12: Applying the Kickoff Glaze of Color
- 1.13 Step 13: Adding Definition with the 2nd Coat of Color
- 1.14 Step 14: Calculation Colour to the Blueprint
- 1.15 Pace 15: Adding Depth to the Pattern
- ane.16 Step 16: The Final Shading Touches
- 1.17 Step 17: Adding the Finishing Touches to Your Giraffe Cartoon
- 2 Frequently Asked Questions
- ii.1 How to Draw a Giraffe for Beginners?
- 2.two Is It Difficult to Draw Giraffe Eyes?
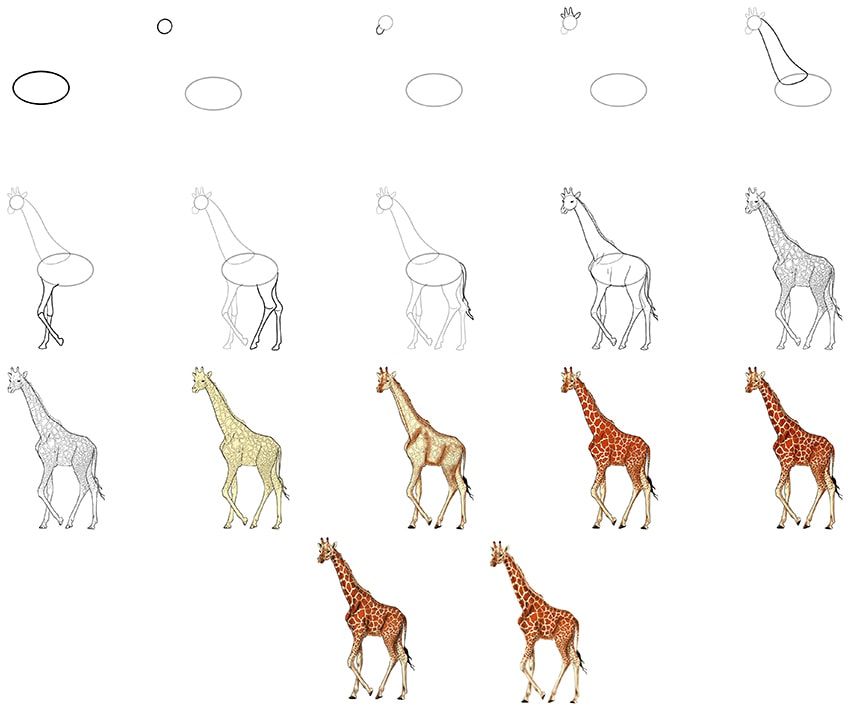
How to Draw a Giraffe Pace-by-Pace
Every bit with any animal cartoon, the toughest part of cartoon giraffes is knowing where to start. In this tutorial, your drawn giraffe will begin with a few very simple structure shapes and lines. The construction method is particularly keen for drawing giraffes because they take such unique proportions. With construction lines, you can make certain that the proportions of your drawn giraffe are perfect before you begin adding color and detailing. In the collage below, you tin see each of the steps of this easy giraffe drawing tutorial.
For the coloring stages of your piece of cake giraffe drawing, there is a lot of liberty for medium preference. Whether you lot dearest to work with oil pastels, on a graphic tablet, or y'all adopt the smoothen glide of watercolor paints, you can hands accommodate the instructions to suit your medium.
With that said, gather up your cartoon tools and meet u.s.a. somewhere comfortable to begin drawing giraffes.
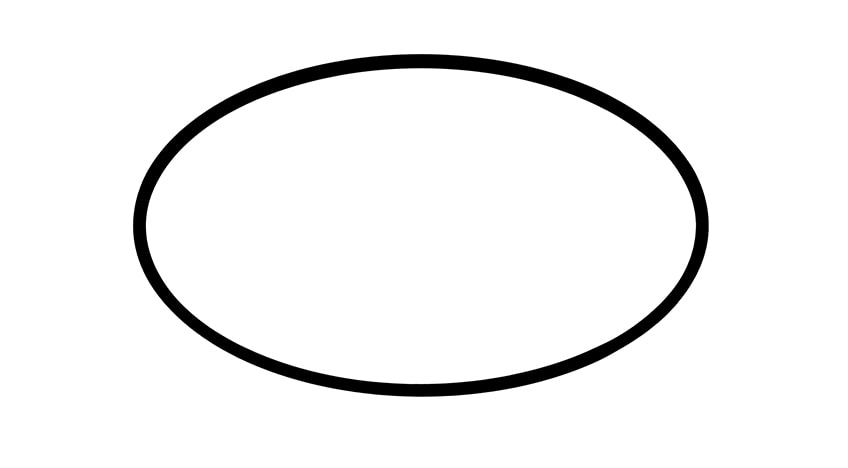
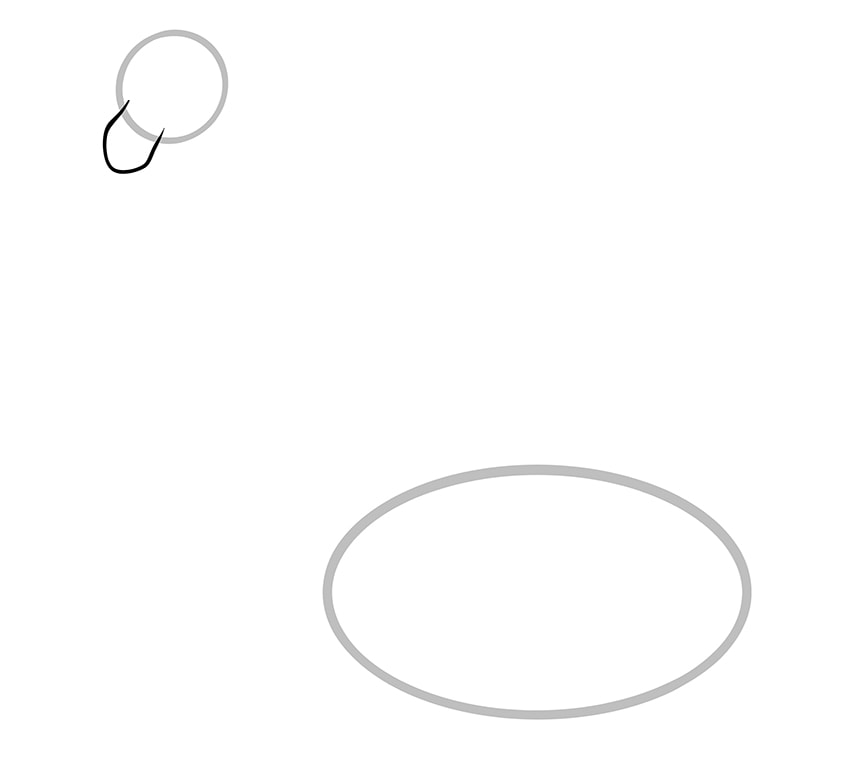
Stride 1: Constructing the Principal Body Shape
It is always best to begin a cartoon by constructing the largest chemical element. Having the largest part of your brute's body down on paper can make the placement of the smaller parts much easier. Equally such, let u.s. brainstorm by using a structure oval to stand for the primary torso of your giraffe drawing. This oval should be horizontal.
The virtually important thing to consider with this first stride is the placement of your master body construction oval. Place this oval at the very center of your canvas, ensuring that there is plenty of space in a higher place and below for the long neck and legs.
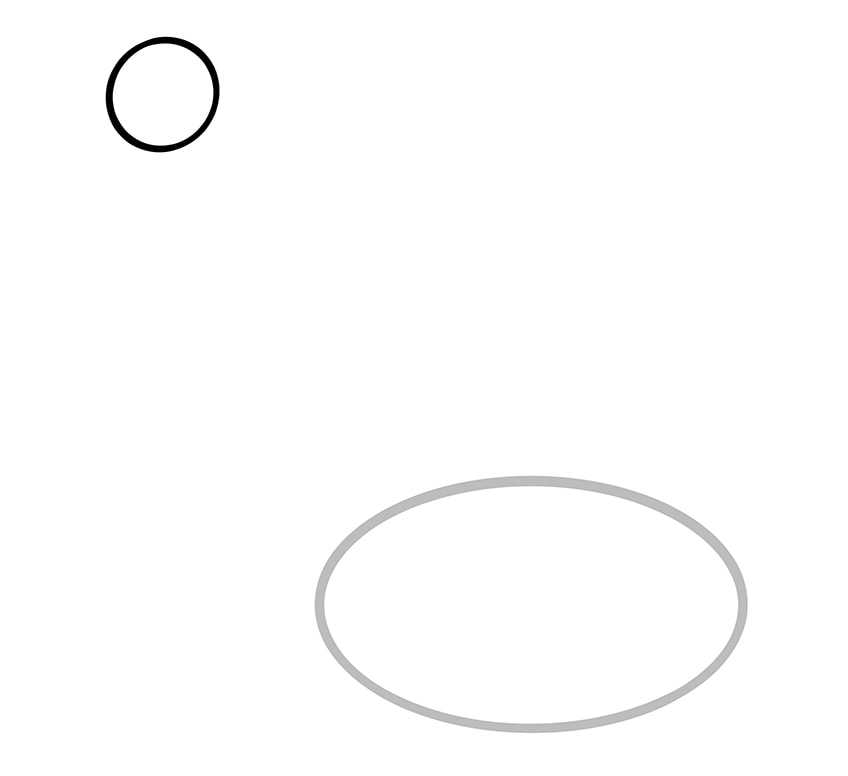
Pace 2: Placing the Giraffe Head
Before we attempt to lay down the neck of your giraffe drawing, we volition place the giraffe head in the top left corner of the sail. Having the giraffe head placed on the canvas will brand the construction of the neck significantly easier.
To the left of the main body oval, and a off-white distance above it, draw a modest circle to stand for the giraffe caput.
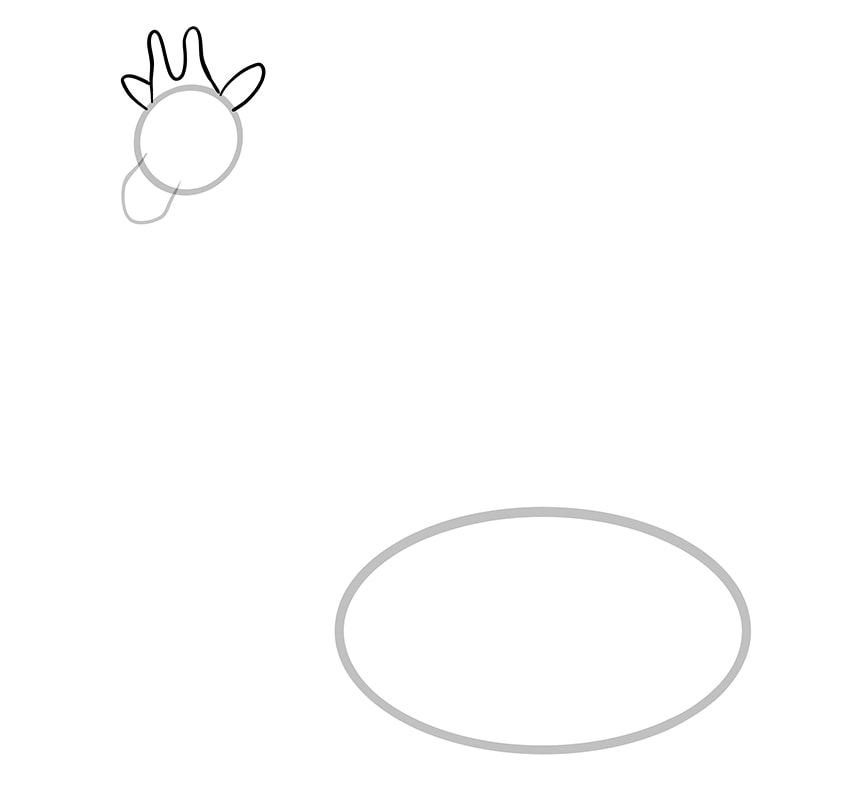
Step 3: Beginning to Draw the Giraffe Face
To begin laying the foundations for the giraffe face, we are going to construct the shape of the cage. Extending from the bottom left side of the head circle, draw a slightly pointed half oval shape.
This muzzle shape should be angled towards the lesser left corner of the canvas and will represent the olfactory organ of the giraffe head.
Step iv: Adding Horns and Ears to Your Giraffe Head
This fourth step in the easy giraffe drawing tutorial is very quick and uncomplicated. On the top of the giraffe head, draw a curvy "M" shape to represent the two brusque horns. On either side of the horns, draw a small-scale curved ear.
The ear on the left of the sail should be partly obscured by the horns, and so you exercise not demand to draw the whole ear.
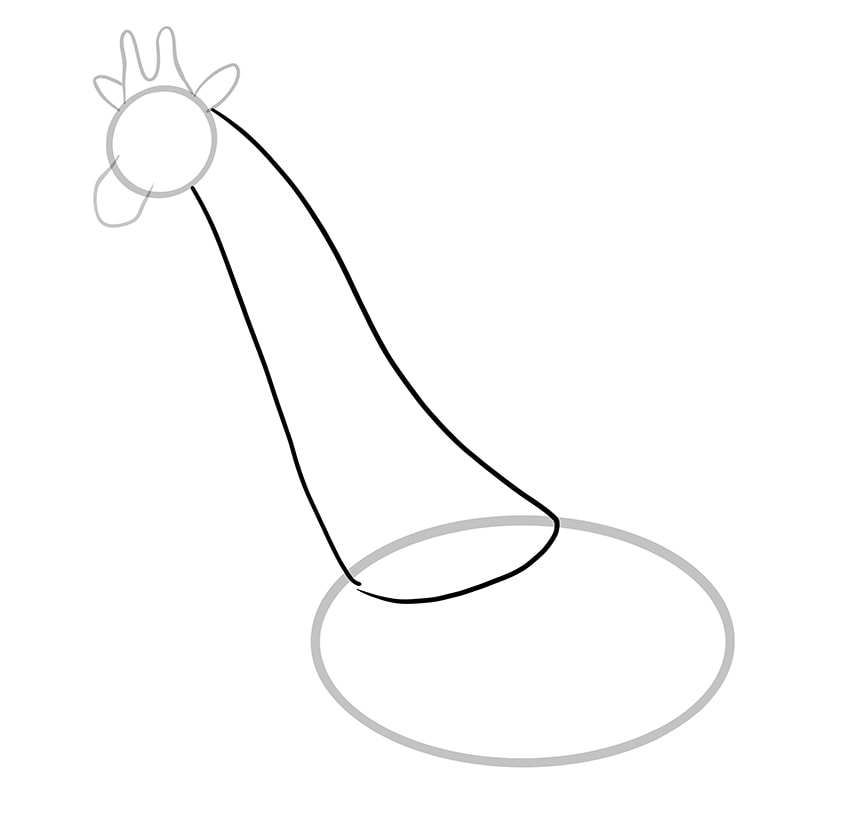
Step 5: Connecting the Giraffe Head and Body with the Cervix
In this stride, you are going to utilise the shape of the giraffe'southward long curved cervix to join the caput and trunk. Begin at the giraffe head, taking the top neckline from the coming together point of the correct ear and caput circle. Gently bend this line upwardly so downwards to encounter the torso oval at the central betoken. For the underside of the cervix, describe a straighter line down from the bottom of the head to meet the body oval.
Finish the giraffe'southward neck by joining the bottom points on the main body oval with a curved line.
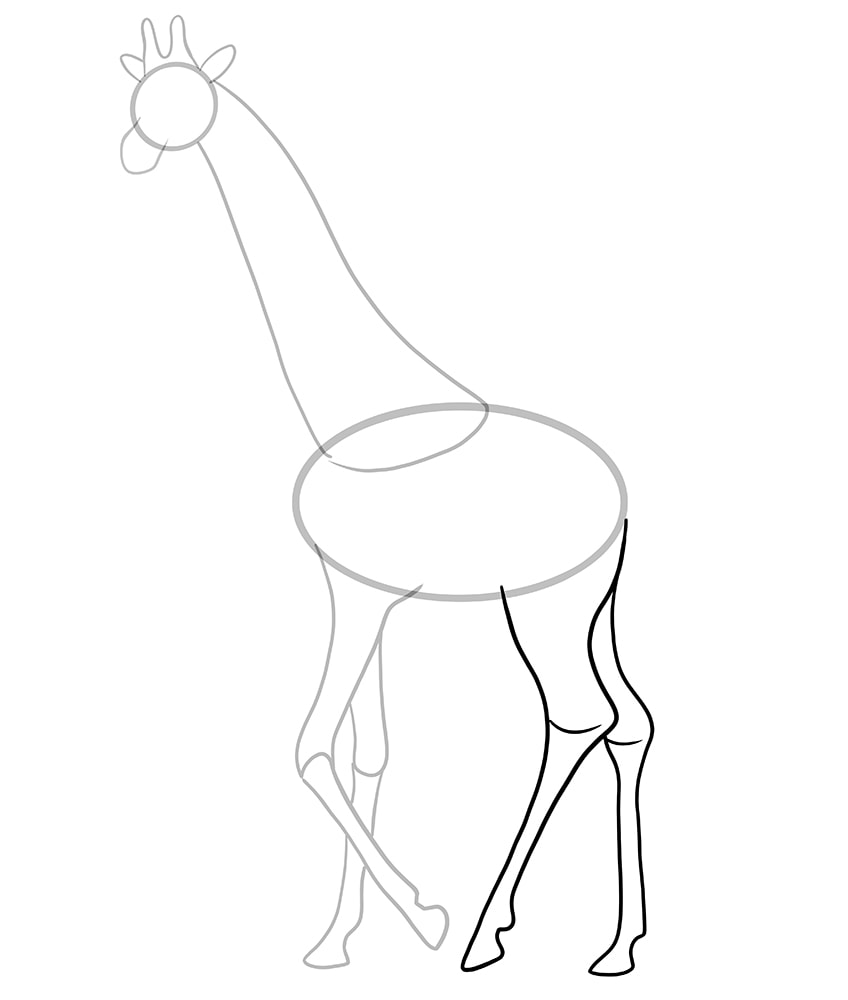
Step 6: Placing the Front Legs of Your Giraffe Drawing
On the whole, giraffes accept very long and thin legs that await a picayune unsteady. To capture the movement of your giraffe, i of the forepart legs will be bent as if it is stepping forward. This bent leg is the 1 closest to our perspective, so we are going to draw this i first. Begin drawing the thigh segment of this first leg at the bottom of the left side of the main body oval. Curve the two lines in and downward, and and so create a rounded knee. At the knee joint, begin to separate the leg by drawing a straighter segment that extends towards the back of your giraffe drawing and ends in a hoof.
Repeat this process for the second leg, but remember that nearly of the thigh will be obstructed past the first leg and that this leg extends straight downwardly.

Footstep 7: Drawing the Back Legs of Your Giraffe
Once you have fatigued giraffe legs once, information technology is very simple to draw the rest as they volition all follow the same bones process. The notable differences to go along in mind with the back legs is that they are slightly thicker towards the summit, and the thigh has a significant curve in the dorsum. Begin past cartoon the leg that is closest to our perspective, meaning you will draw the entire leg, with the back bend beginning at the back point of the main torso oval. The knees for these back legs are higher and wider than the front ones. This first dorsum leg will bend in the opposite management to the forepart leg, with the hoof extending forward.
For the second dorsum leg, only repeat the process remembering that it volition be partially hidden behind the first one and that it will extend direct downward.
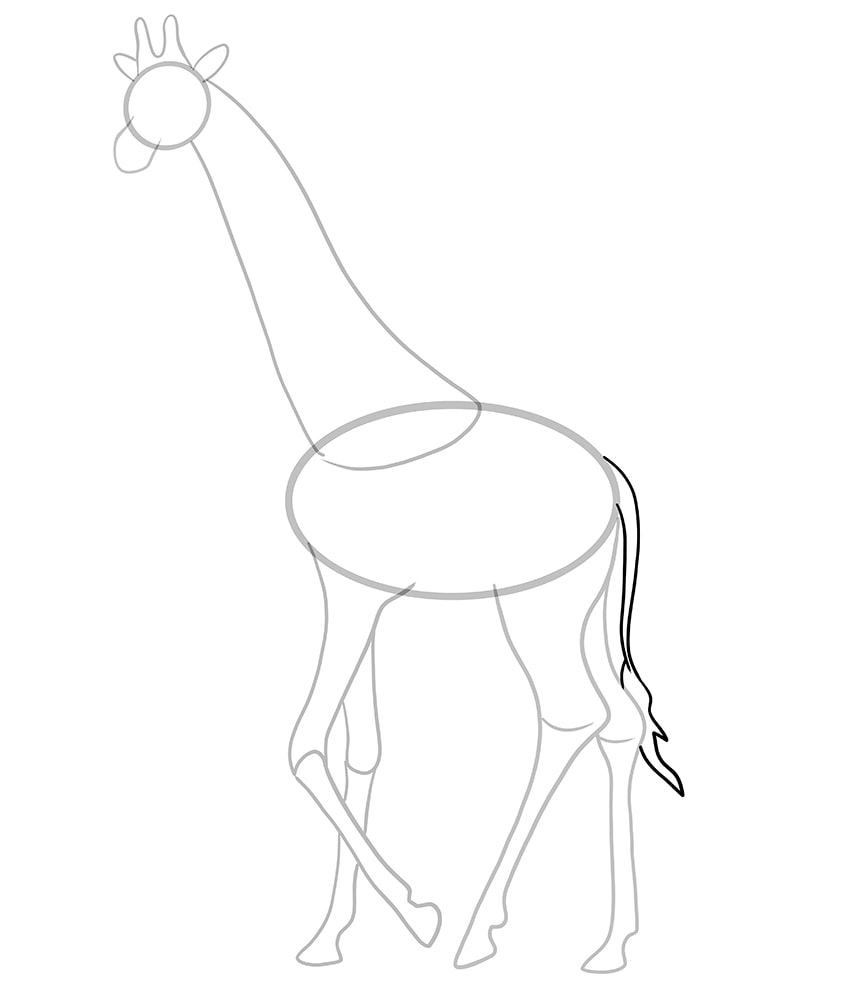
Step viii: Outlining the Tail of Your Giraffe Drawing
For this final construction step, you are simply going to depict the outline of the giraffe'due south tail. The tail is quite long, catastrophe only below the knees of the back legs. Begin the tail outline at the dorsum of the main body oval, and curve it down.
Cease the tail by calculation a thicker terminate that is partially obstructed by the knee joint of the back leg.
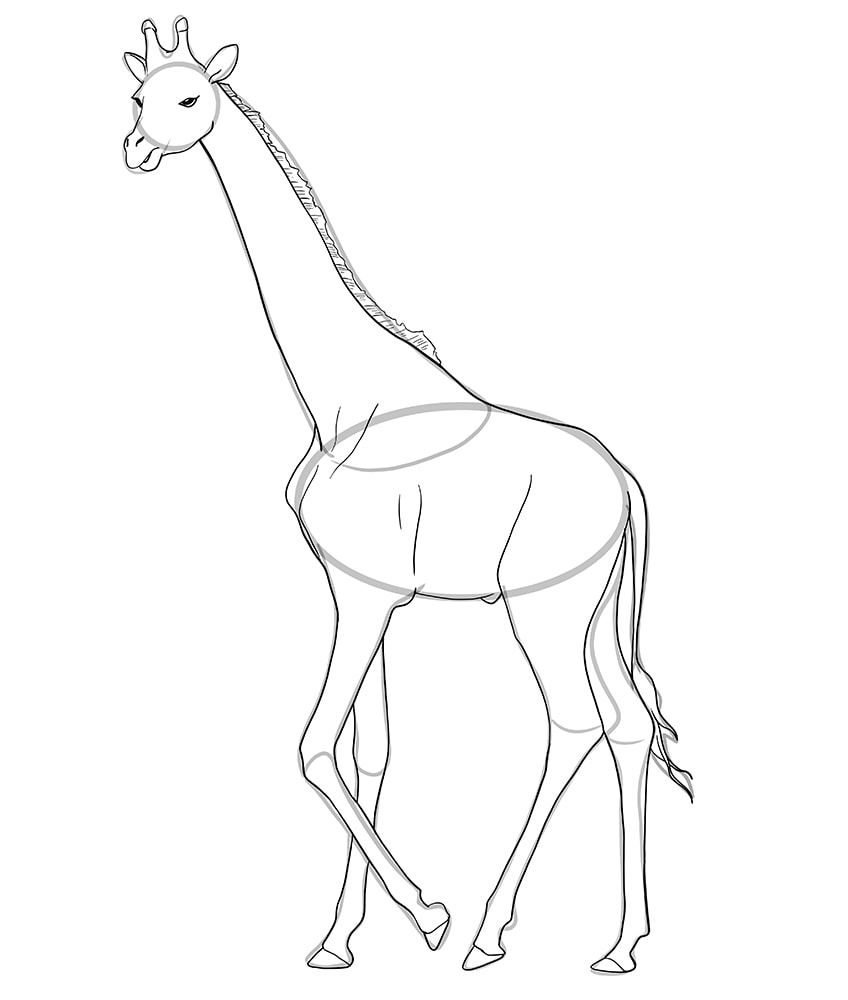
Step 9: Creating the Final Outline of Your Easy Giraffe Drawing
The time for construction is over, and we are at present going to apply all of the foundational lines to create the terminal outline of our giraffe drawing. In this step, you are going to add details to the giraffe face, including the giraffe eyes and nostrils, and you lot are going to add details to the main, horns, and ears.
Brainstorm at the caput, following the outline of the structure lines and adding a piddling bend at the nose to create the mouth separation. Next, for the signature giraffe optics, describe a little almond shape in the caput and another half eye on the side. Add two little nostril shapes on the olfactory organ and add details to the horns and ears.
As you move downwards the neck, you can stick to the structure lines quite closely, but apply the superlative outline as the mane outline. Add modest horizontal lines to the primary and make the edges a lilliputian jagged.
Continue to outline the trunk, adding petty humps on the giraffe'south backside, chest, and underbelly at the top of the legs. You tin follow the outline for the legs and hooves quite closely, but do non add the separation line between the thighs and calves. Instead, y'all can add a pocket-size line to separate the hooves from the rest of the legs. For the final touch, add a realistic hairy tip to your tail.
When you are happy with your outline, yous can erase any of the remaining visible structure lines.
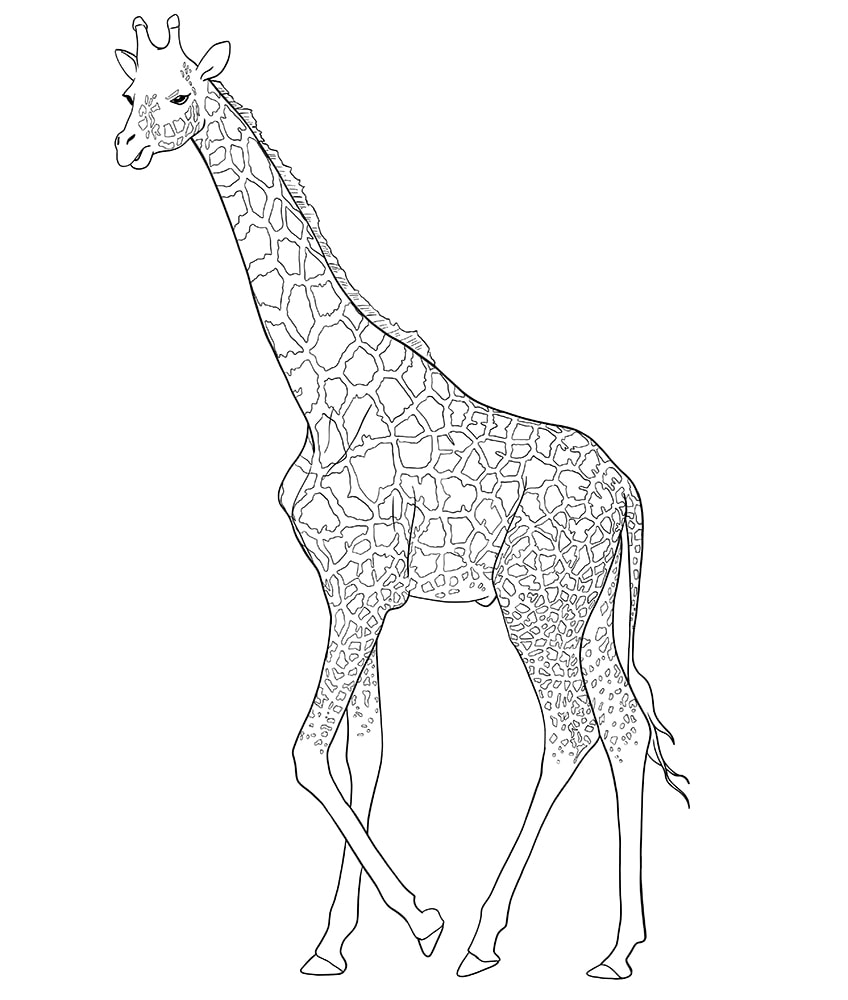
Step 10: Creating the Signature Pattern Item
Now that yous have the outline of your giraffe drawn, it is time to create that beautiful pattern. Begin at the face, drawing some pocket-sized slightly geometric shapes around the middle and chin. Go along this pattern down the giraffe'south cervix, making the shapes slightly bigger every bit you motility toward the chest. When drawing shapes effectually the edges of the neck, curve them slightly so that they appear to wrap around.
Every bit you lot approach areas of the giraffe'due south body that are narrower, like the legs and tail, begin to make the design smaller. The design should also end but above the knees on all legs.
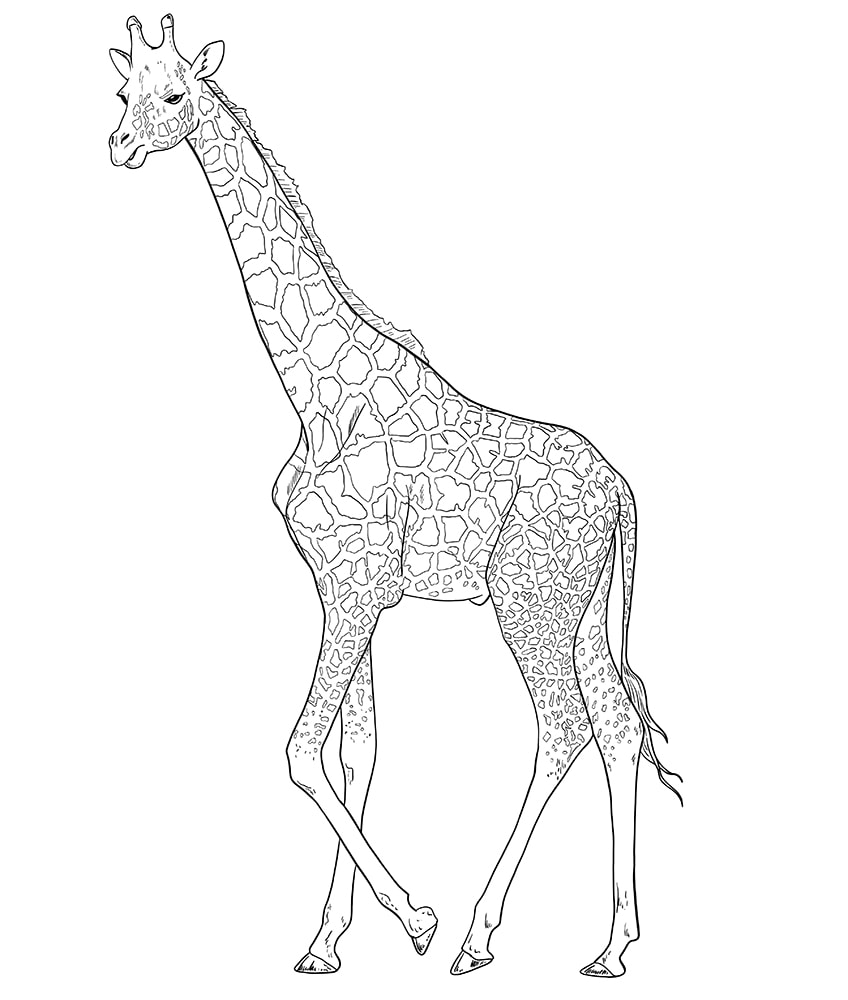
Footstep 11: Calculation Texture Throughout Your Giraffe Drawing
In this step, use a few short texture lines throughout the torso of your giraffe to add depth and texture.
Focus this shading around the horns, mouth, knees, hooves, and ankles.
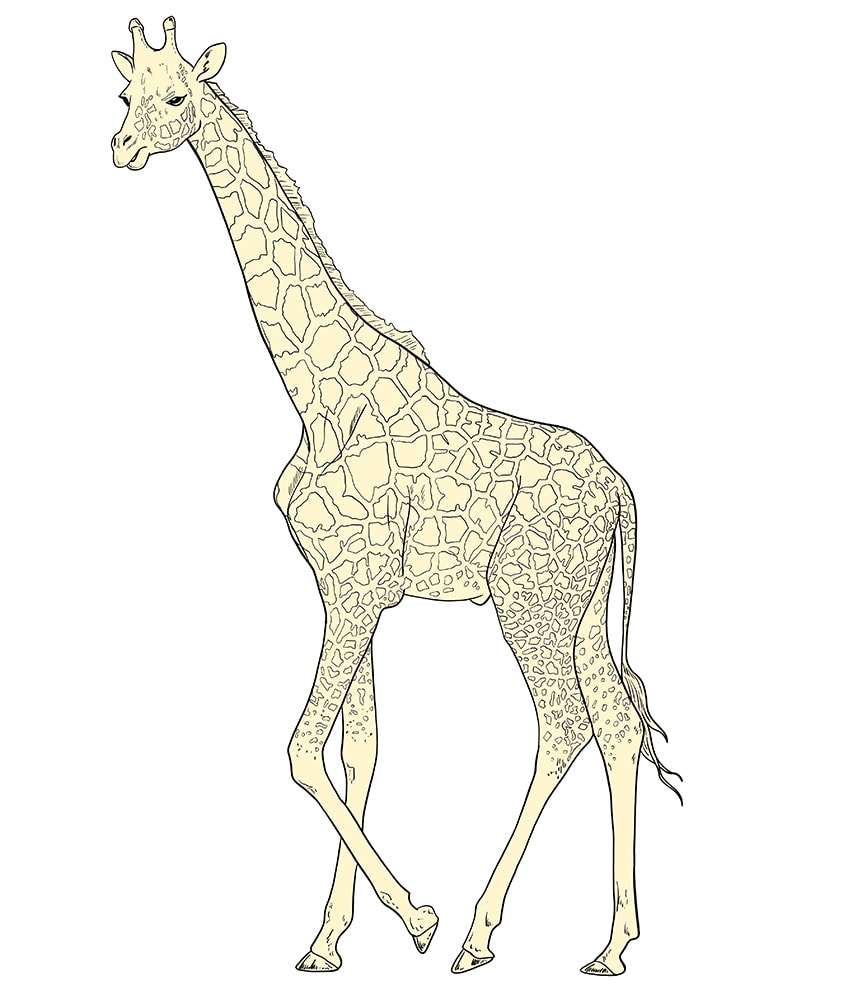
Stride 12: Applying the First Coat of Color
If you have a look at the final giraffe cartoon, you volition notice that there is quite a lot of colour variation in the coat. To attain this look, nosotros are going to build upwardly the final color using several dissimilar layers.
For this first base of operations layer. apply a normal castor (or your chosen medium) to color the entire giraffe with a lite yellow shade.
Step xiii: Adding Definition with the 2d Coat of Color
The 2nd color yous are going to utilize for your easy giraffe drawing is a light dark-brown shade. Employ this color to gently carve out the shape of your giraffe's body, adding depth to create a sense of iii-dimensionality. Add brown to the horns and along the cardinal ridge of the face. You can besides colour the tips of the main brown and add a stroke down the underside of the neck.
On the trunk, use the brown to mark out areas where the low-cal would naturally miss, including the ridge behind the chest, along the belly, and in the grooves where the legs come into the body.
Use some more low-cal brown sparingly to shade the top of the giraffe's back, the elevation of the tail, and the back sides of all of the legs. Y'all can then finish this step by using a bear on of black paint to color the tip of the tail and the hooves.

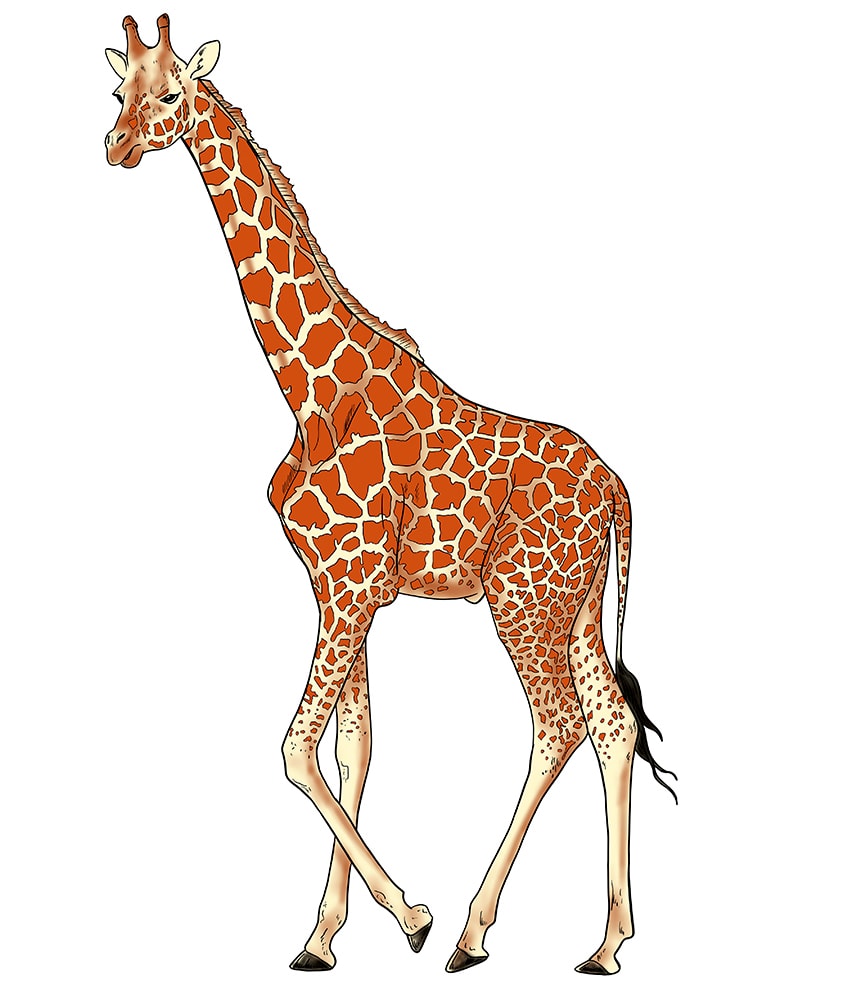
Step fourteen: Adding Color to the Design
In this coloring step, you are going to add colour to all the shapes of the design we created earlier. The ideal shade for this pace is a slightly burnt orange, as yous do non want it to exist also vivid.
Using a fine castor and this color, simply fill up in all the shapes of the pattern.
Step 15: Adding Depth to the Pattern
For this quick and easy step, you are merely going to use a minor soft brush and a touch of black paint to add together shading to the design shapes.
Make sure that you lot do not go too heavy with the black shading, as information technology tin can become overwhelming very quickly. You can always add more, but information technology is very hard to have it away.

Step 16: The Terminal Shading Touches
In this final shading step, you lot are going to use a trivial more black paint and a small soft brush to add the final dimension throughout your giraffe drawing. Begin at the head, adding shadows to the nostrils, horns, ears, and other facial features. Proceed down the neck, calculation shadows where you would not expect natural light to fall.
For the remainder of the trunk, use the texture lines you drew in step 11 as the central points of your shading within the legs.

Step 17: Adding the Finishing Touches to Your Giraffe Drawing
If you are happy with your giraffe cartoon, so you tin leave information technology equally it is. If, however, you want a more seamless finished product, yous tin can now erase the outlines. If you lot are using a graphic tablet, this step is little more than than a click of your pen. For those of you using a more physical medium, you tin simply use the respective color at each point of the outline to trace over information technology.
You tin can do the same for the detail lines within the body.
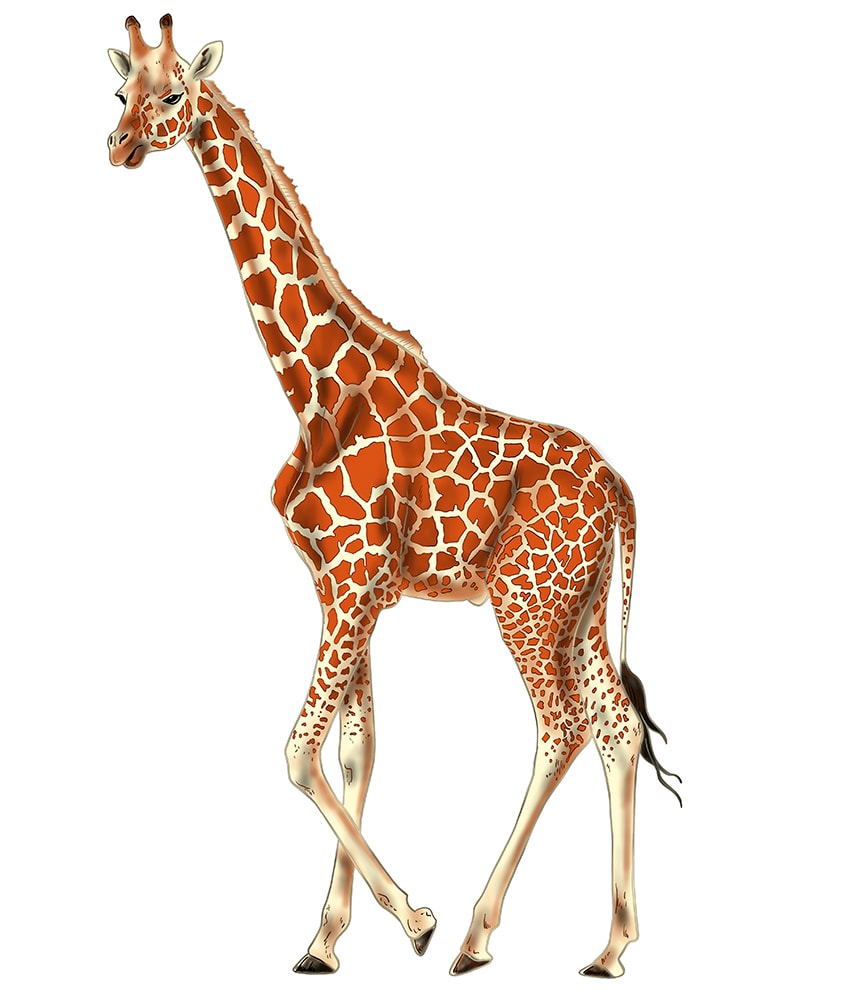
Hopefully y'all accept enjoyed the drawing process of our easy giraffe drawing tutorial. You should at present know the basics of how to describe a giraffe head, a giraffe confront, giraffe eyes, and the full shape of a giraffe.
Frequently Asked Questions
How to Draw a Giraffe for Beginners?
If you are an artist at the starting time of your journey, you may feel that creating a giraffe drawing may be too hard. This is not truthful! With our piece of cake giraffe drawing tutorial, you can acquire the bones steps for drawing a giraffe and you can and so use these concepts to learn how to draw a range of other animals likewise!
Is It Difficult to Describe Giraffe Eyes?
If you were to describe a giraffe face in more detail, there may be more to cartoon giraffe eyes than we encompass in this tutorial. Notwithstanding, the giraffe eyes in our tutorial are minor, so you simply need to depict a modest oval shape.

Source: https://artincontext.org/how-to-draw-a-giraffe/
Posted by: williamsblithad.blogspot.com
0 Response to "How To Draw A Simple Giraffe"
Post a Comment